In this chapter we were supposed to fold, rip, scrunch.... various papers to see its effects.
I used Liquitex matte medium to glue the pieces to the pieces to the black paper.
2a: copy paper folde, ripped
2b: a finer version of tissue paper, It's interesting to see the marks of the glue under the paper
2c: tracing paper, this paper is stiffer than the normal paper, the creases stand up because it was difficult to glue them "flatter"
2d: paper used in toilet to dry hands, I like the feathery effects the paper creates when ripped. It somehow reminds me of frost
2e: Japanese batik paper , when torn this paper creates fibrous edges
2f: another Japanese paper with incorporated leaves
2g. paper for pattern tracing
2h: crêpe paper
2i: packing brown paper, notice the pattern of the "stripes" in the paper
2j: scrunched copy paper
2k: scrunched tissue paper, the pattern in the creases is finer than in sample 2j where the paper is stiffer
2l: scrunched crêpe paper: this paper proved more diffidult to scrunch. Also I tried to take advantage of the quality of the paper and tried to give it a bend
2m: scrunched paper for pattern tracing. The grid on the paper creates a secondary pattern
,
2n: paper for drying hands
2o: Japanese batik paper
2p: transparent fibrous paper
2q; kitchen roll paper
2r: packing paper
2s: very thick candy box lining paper
In general one can say here that the stiffer the paper, the coarser the scrunched surface and the higher the relief is. The paper holds its creases very well.
With lighter, tissue like paper the creases are much finer and could be more "controllable"
Manipulated tissue paper:
2*a: twisted tissue paper, looped before being glued down
2*b: twisted, knotted and spiralled
2*c: two strips of tissue paper were interlinked, then flattened before being glued down
2*d: another scrunched tissue paper sample where I tried to put more glue under the surfaces that weren't crumpled
2*e: another pleated kitchen paper sample, in the lower part I tried to rip the paper and overlaying the strips so that the edges would create an interesting surface
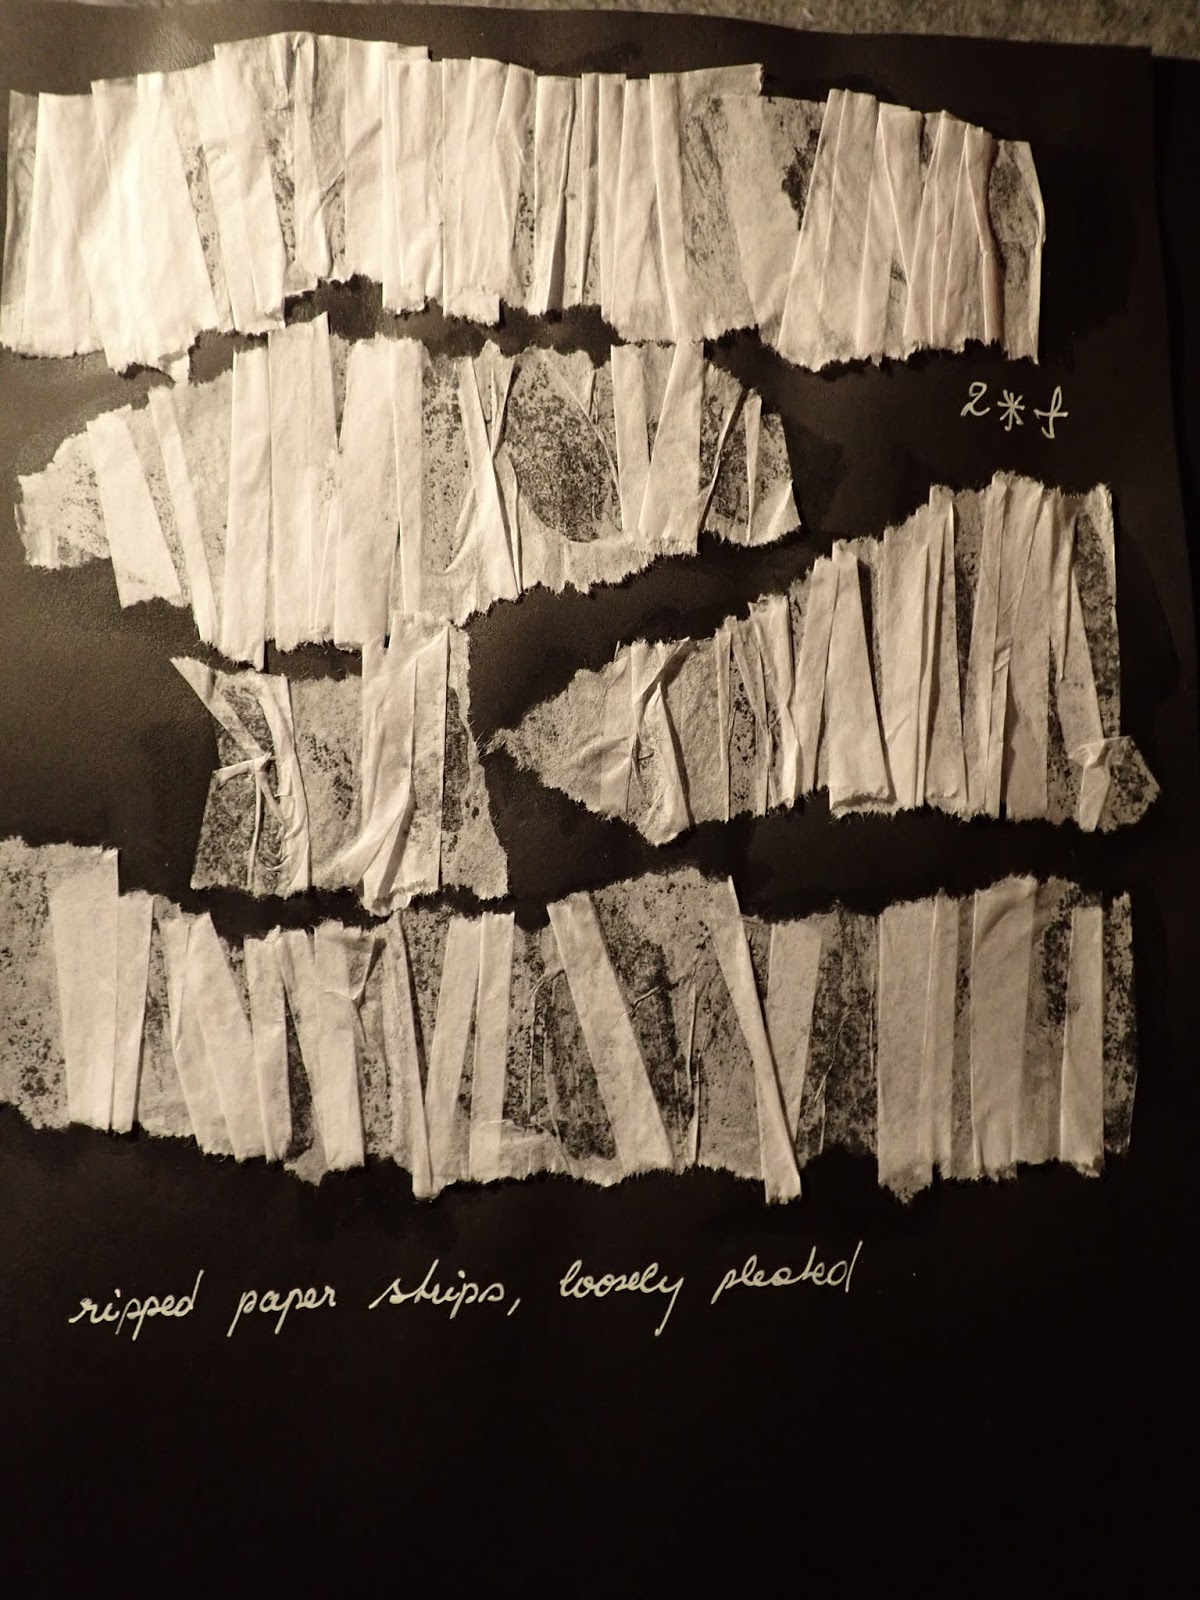
2*f: ripped tissue paper, loosely pleated
2*g: loosely pleated tissue paper, creating more organic shapes with tonal effects where the black background shines through
2*h: pleated vertically and horizontally
2*i: handpleated strips, curved
2*j: little paper triangles were gathered then glued
2*k: paper rectangles were gathered in the middle part and form little bows
2*l: a longer piece of paper gather with hand stitches, creating larger pleats
2*m: these two paper strips were not pleated when glued down, Instead a drinking straw was used to create a "resist" when glueing
2*n: scrunched tissue paper, parts of it was twisted to create little peaks stiffened with glue to make them stand (cf. shibori resist technique)
2*o: packing paper strips were folded in half, then ripped before being glued down
2*p: folded paper strips, cut/ripped before being glued down
2*q: copy paper was scrunched, flattened, gathered with hand stitches. I couldn't resist to rub the edges of this sample with a "Woody Stabilo", then water it down to make the creases come out more clearly.
2*r: machine gathered tissue paper strip
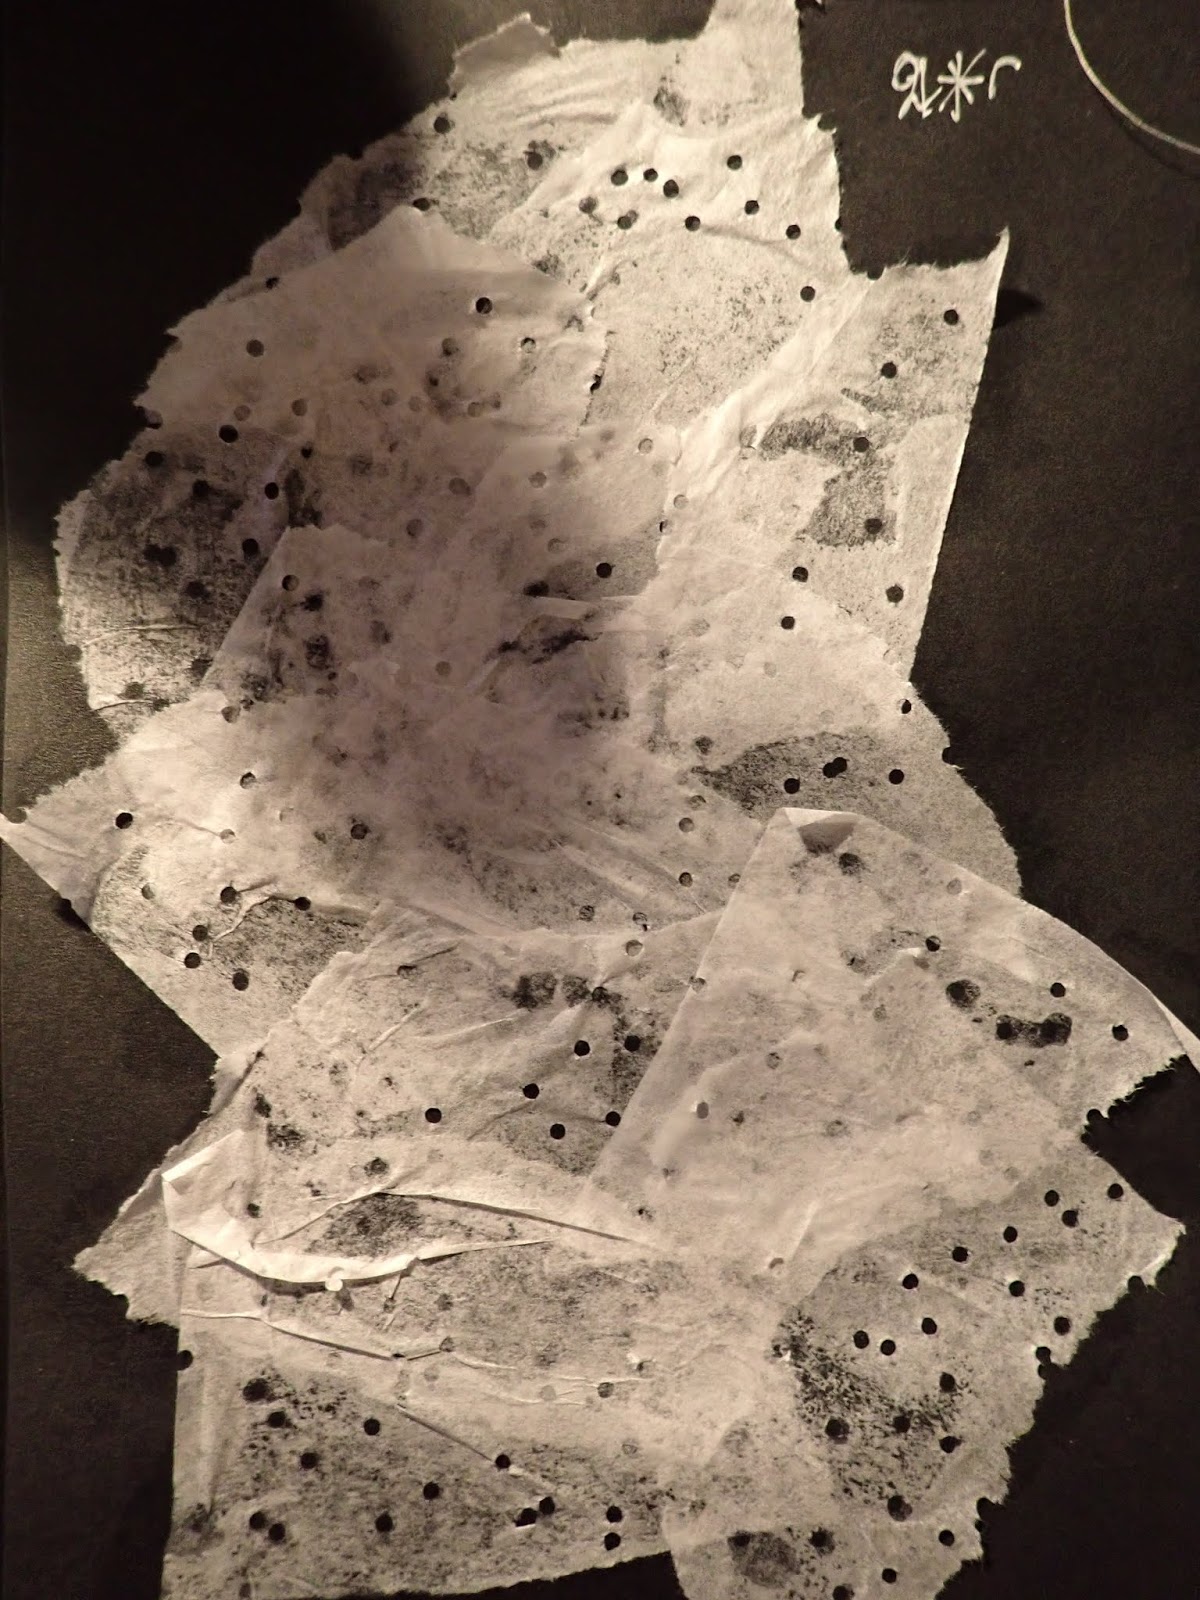
2*s: sorry there is a mistake in the denomination : overlaid torn tissue paper with fine holes
2*t: pleated tissue paper with holes