Sunday, 26 February 2017

Module 4-Chapter 9 - Stitched Edges


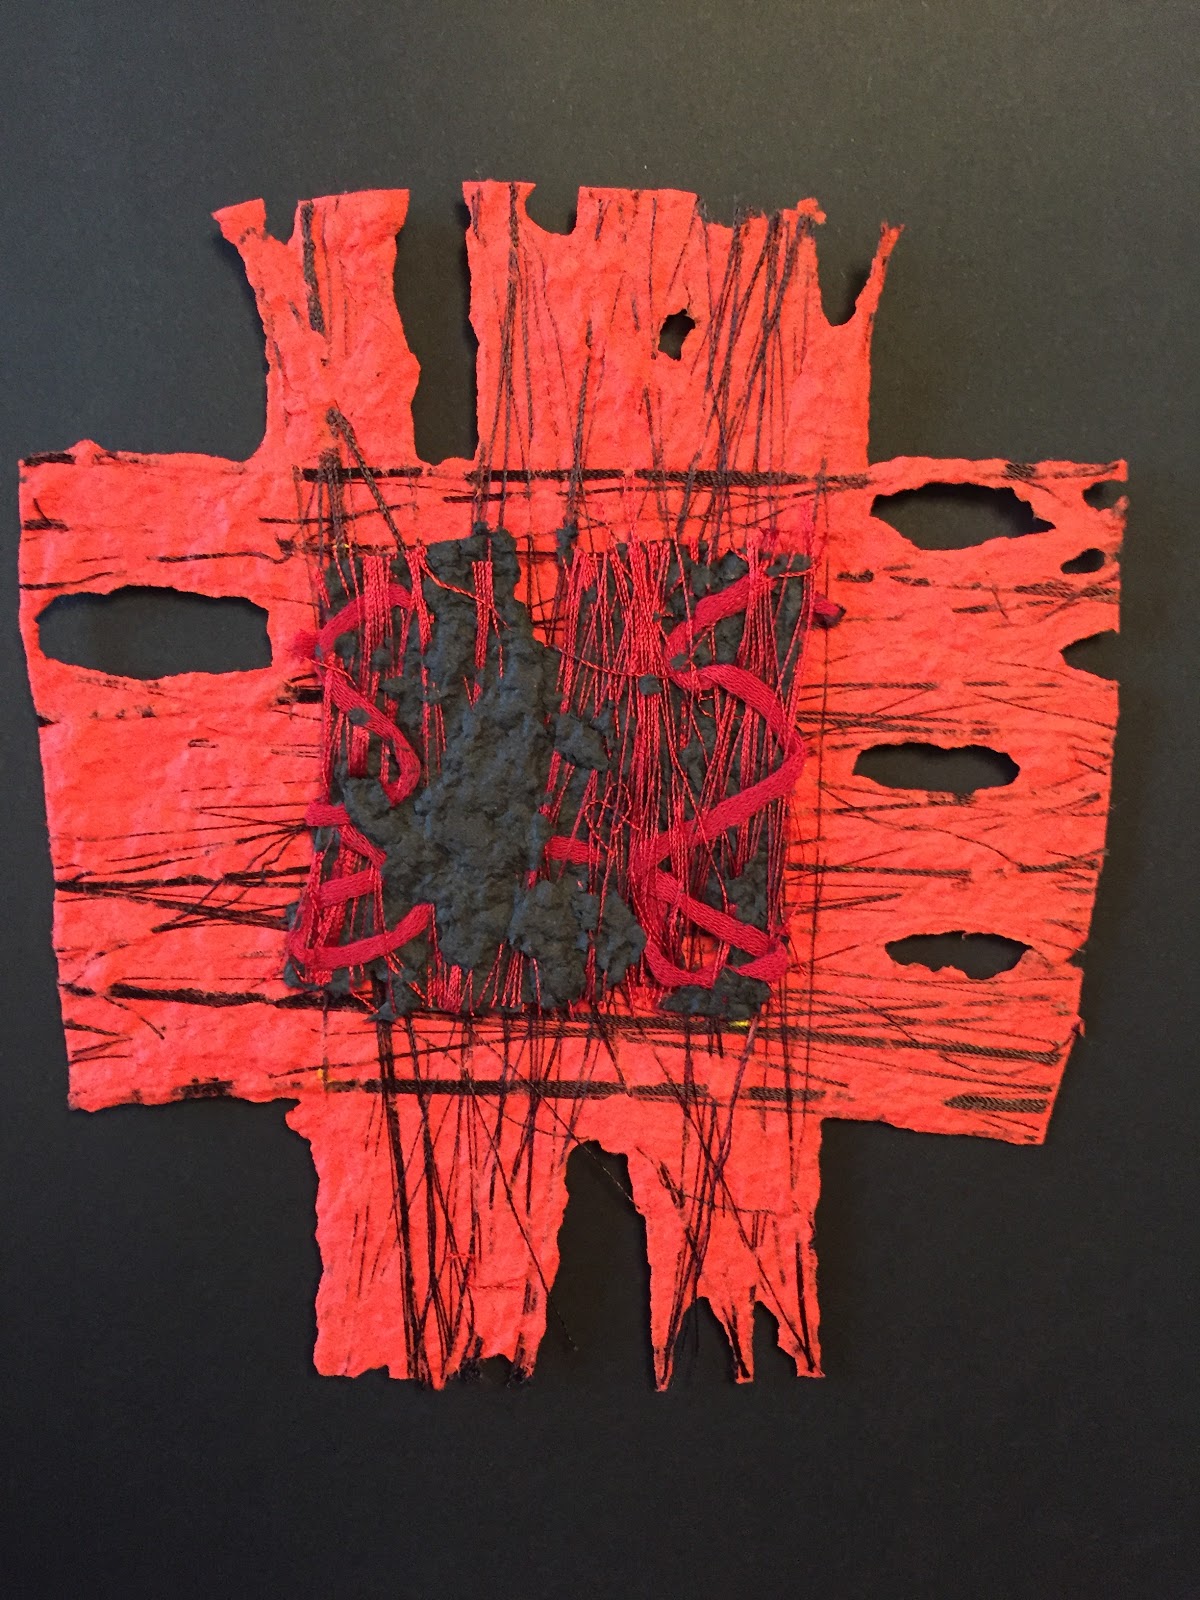
sample 9a:red chenille yarn was wrapped around the edges, because of the irregularity of these, the stitching becomes irregular too


sample 9b: here the edges were first wrapped with a fabric strip from the fabrics from this module. This was stitched in place with a straight stitch. Then the edges were decorated with beads


 sample c: edges decorated with free motion circular stitching, the paper is backed with red fabric


sample d: a normal office  paper punch wasused to make the holes into the paper. Then a cord made of perle coton was wrapped around the edges. A bigger cord is then threaded through. The bottom edge is fringed

 sample e: these edges were wrapped with a blanket stitch before the red yarn was threaded through


sample f: the edges of this samples have been decorated in various ways. The pins in the bottom line come from a new man's shirt and embroidery thread was wrapped around them.

Both the bottom and the left edge are backed with red commercial felt to hide and secure the pins.

Paper clips are decorating the upper edge of the paper and are fastened with a zigzag stitch. A red (polyester) ribbon is woven through the paper clips and secured with a zigzag stitch.

---------------------------------------------------------

Some of the samples have to be backed with fabric,As this is seen when the papers are used in a book, a solution has to be found to form a nice finish. The fabric could be  decorated with additional stichting before being added to the paper.

Saturday, 18 February 2017

Module 4-Chapter 8-Stitchery into Paper

I  enjoyed working on this lesson, Stitching into the samples  really brought them to lifeand added dimension to them


sample 8a:: for this first sample diagonal lines were stitched to the paper to form a grid into which black thread was woven through and at the same time twisted to form a loop to reproduce the pattern shown in the first picture. The loops were held in place with a small stitch . I also tried to not make the stitching too dense so that the paper pulp and fabric would shine through.


sample 8b: here the paper/fabric sample was first covered with machine stitching, then a variegated thread was woven through it to reproduce the lettering shown in the first picture. This "medaillon" was surrounded with machine stitching


sample 8c: here free-motion zigzag stitching was used to stitch into the circles


sample 8d:the inspiration for this piece came from the lettering exercise where the letters were formed by printing with the edge of a credit card. When you turn the paper a mysterious  pattern of lines appears. I try to imitate this by using fly stitch with a black thread.


sample 8e: The stitching turned this very "boring" paper/fabric sample into an interesting piece achieved by making long stitches to form the letters. This sample should be seen horizontally so that the letters are not legible. Deliberately no stitching was done on the surrounding fabric so that the eye would not be distracted from the strong graphic mark done with the stitching


sample 8f: The letter "L" was done with cross stitching, trying to achieve a "dissolving" effect


sample g: free-machine stitching was done on this piece, first "writing" horizontally then vertically the words "shopping list"


sample 8h:I couldn't resist trying to  reproduce the pattern formed by cutting out the letters with my Silhouette. For this I drew the pattern onto paper and then stitched through it from the back. However the tracing was hard to be seen from the front, so for the lower part I did the same from the front and then, after having puller all the paper bits out, I used more free-motion stitching to fill out the letters

sample 8i: fly stitch was used to form the square around the open spaces. These were filled with letters, X's and then zigzag stitching

All these samples were backed with light red commercial felt

Sunday, 29 January 2017

module 4-chapter 7-to apply paper pulp to a woven fabric grid part 3

 7r: here I tried to make a long sample made in two parts. Some cut out circles from another sample were applied to the fabric: in the upper part of the sample those circles are between the fabric and the paper, in the lower part they were applied on top of the fabric

 7s: fine sewing thread was wrapped around a square wire frame and then dipped into the paper pulp. I like the holes formed at the edges . Some golden paint was applied with a "pearl pen" from Viva Decor. Initially I wanted to introduce some beads to the thread during the wrapping process but forgot about it. The "beads" hadn't fully dried when I applied the pulp and turned flat.
Nevertheless I love this sample. Thread forms a grid that looks like drawn lines

 7t: another little sample made by wrapping red sewing thread around a frame. Knitting thread was then woven into it before being dipped into the pulp. Some black pulp was put on top to keep the whole threads together
7s+t: just a little try how it would look like if I put sample 7t on top of sample 7t

7u: here the circles were cut out by hand as the Silhouette plotter wouldn't cut properly. However, the software allows to place the circles in a regular grid very easily. The fabric was then embedded onto black pulp and framed with red pulp with red paper pulp dots put in the middle of the circles

7v: the word  "list" was welded with the Silhouette software to form a grid cut out of coton poplin (backed with Silhouette adhesive paper to stiffen it). When you turn the sample the word are not recognizable any more but the negative space form interesting shapes
2


Wednesday, 11 January 2017

Module 4-Chapter 6-To apply wet paper pulp to woven fabric - part 2

7l: here the woven fabric with the withdrawn threads was pushed into the very wet paper pulp so that the pulp came through the threads

7m: some of the threads were withdrawn, then gaps were cut into the fabric. Again the fabric was pushed into the wet pulp to make sure it is embedded safely

7n: the fabric grid was made by cutting out horizontal strips then these were used to be put back into the created gaps.
7o: fabric strips with withdrawn threads were embedded into the red pulp, then black paper pulp was put on top. I like the way the fabric structure shows through the black pulp. This structure could be reproduced onto the black pulp with stitch


7p: withdrawn threads from previous fabrics were embedded into the black pulp, then a frame of red pulp was put on top
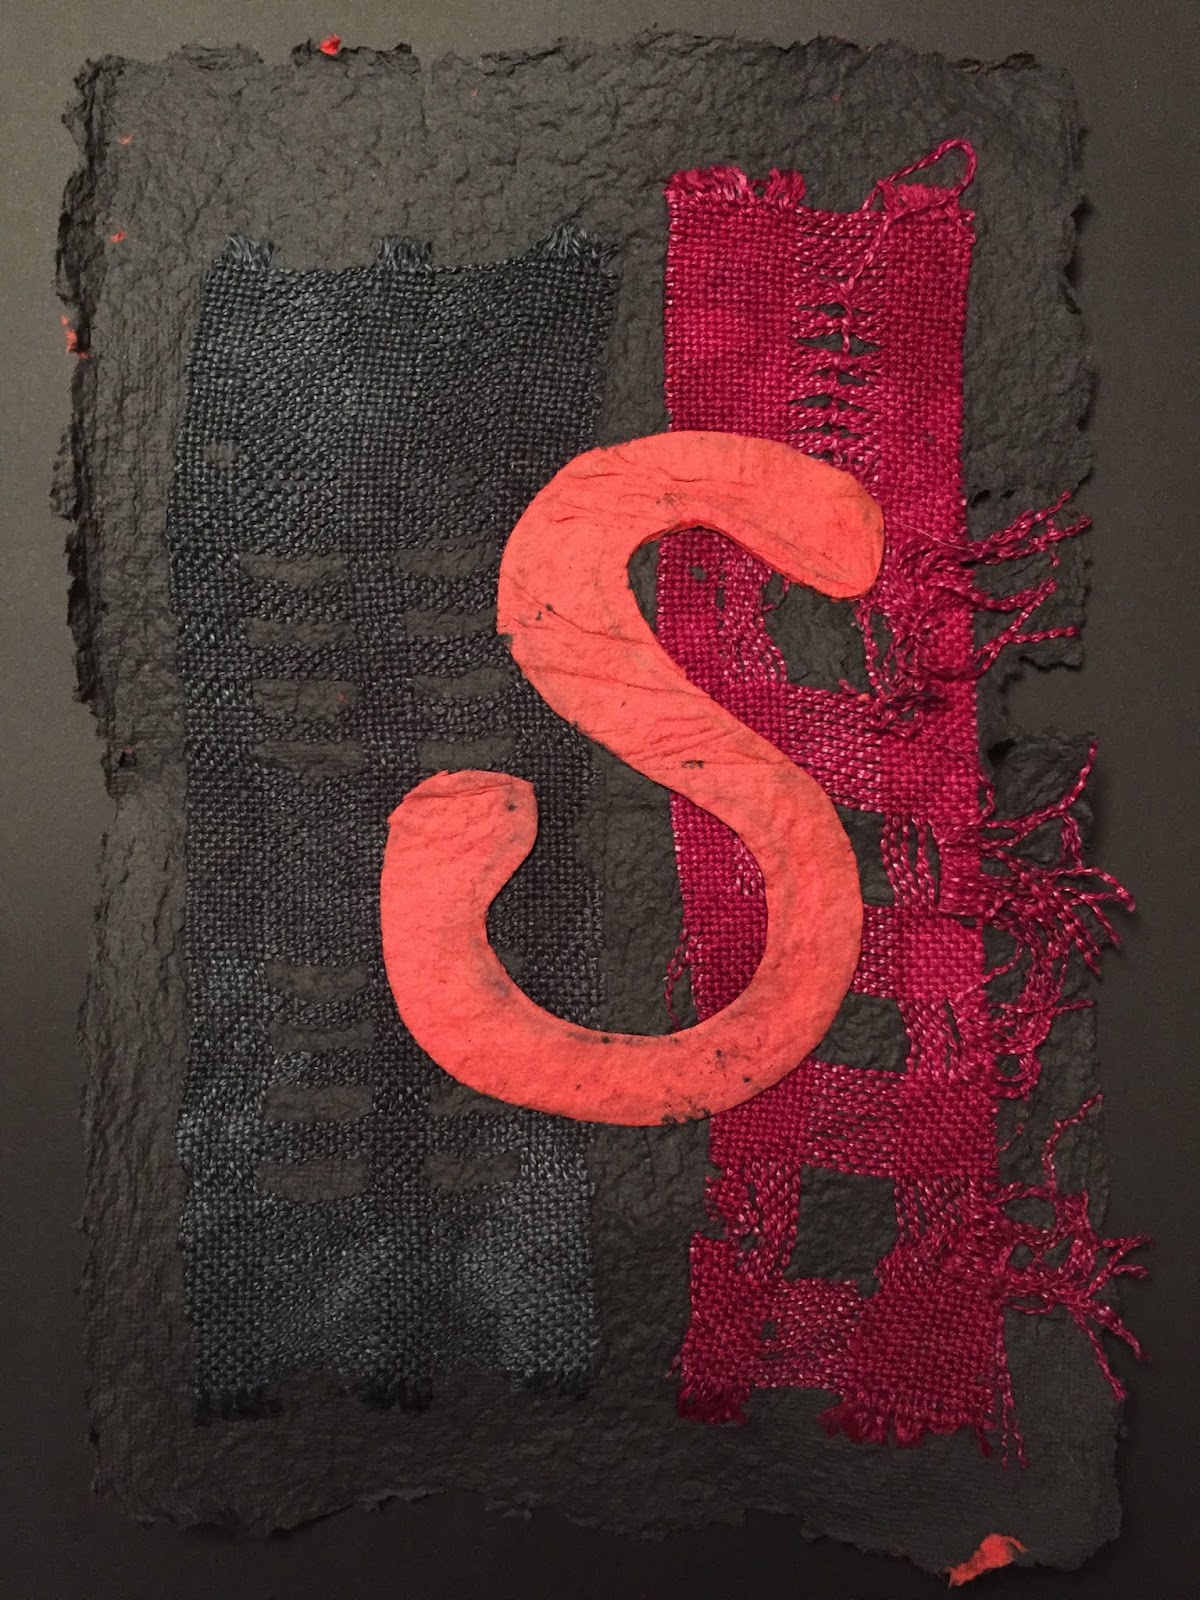
7q: the letter "S" was cut out of some red paper and embedded, together with some fabric strips onto black pulp. The letter doesn't seem to be very "integrated" but I think the later stitching will help unify the whole sample

This second batch of papers proved more successful as I embedded the fabric into the very wet pulp. I'm quite happy with the results as the fabric really gives the impression "to be part of" the paper

Thursday, 5 January 2017

Module 4-Chapter 6 - Drawn Thread Work Stitchery

A selection of bought dyed threads

 6a: Stitchery ideas to decorate the drawn fabric:
- row 1+2: weaving wit strips of torn black fabric, stitched with fly and cross stitch
- row 3+4: weaving with burgundy knitting yarn
- row 5+6: weaving with black/red cord
- row 7,8,9: weaving with black ribbon, a red embroidery was woven through the black rows vertically
- row 10: knotte rows, partly beaded
- row 11: red organza ribbon knotted
- row 12: red organza ribbon knotted and beaded
- row 13: herringbone stitch "woven" around a set of 4 threads
- row 14: black and red embroidery thread wrapped around a set of threads
- row 15: blanket stitch worked down columns of withdrawn threads
- row 16+17: blanked stitch worked horizontally


 6b: 
- row1; chain stitch worked across a machine stitched row
- row 2: machine stitched
- row 3: simple weaving with black ribbon
- row 5 simple weaving with fine red thread with a black thread woven vertically through it
- row 6: weaving with thick knitting yarn
- row 7:  weaving with a narrow ribbon, columns of black blanket stitch added
- row 8: cross stitching
- row 9; weaving with a large braided cord
- row 10: bands of withdrawn threads were held together by wrapping a red embroidery thread around it
- row 11: machine stitching
- row 11-14: weaving with torn red fabric strips to form a pattern
- row 15: weaving with knotted black and red fabric strips, stitched with a straight stitch to keep it in place
- row 16-18: weaving with black and red fabric strips
- last row: weaving with braided cord


6c: black and red pipe cleaners were woven through the fabric and further attached with blanket stitch. Although lying reasonably flat, this little sample can be bended to form a 3-dimensional item.
I like the somewhat organic look of this sample. The pipe cleaners could be wrapped before being woven


6d: Diagonal stitching on the cross-overs
This exercise was done with different kind of threads from knitting yarn to braided cords in different red tones. I took some time to figure out how this method works.


 6e: Diagonal stitching on the bars
equal groups of threads were withdrawn to form a grid. Stitching was then done (both hand and machine) across the withdrawn bars. I love the little "centers" that this method produces. Further weaving could be done through the grid.


 6f: Machine zig-zag stitching
This sample was done without the use of a hoop and the zig-zag stitch was done with lowering the feeed dogs. I tried to vary the stitching sometimes gathering just a few threads, sometimes grouping more threads together. This way of working results in a very unpredictable organic look.
I also introduced different threads to group together and stitched them down horizontally to split up the grid
This added another color dimension to this sample

6g: another sample using zig-zag machine stitch, weaving in the withdrawn threads and introducing other different red threads


6h: here bands of withdrawn threads were formed and stitched down with a zig-zag stitch, further machine stitching was added


6i: here the threads were snipped in the centre and withdrawn from the centre outwards. The bundles of withdrawn threads are held down at the beginning and the end . The further machine stitching was done over each short bar.

6j: Although it doesn't look like it, a lot of machine stitching went into this sample. Threads were first withdrawn both horizontally and vertically. The machine stitching was done across the bars with black and red thread. Additional black threads were introduced horizontally and overstitched with red thread. Simple lines were added with straight machine stitching, then little "stitched beads" were added. I also added some tiny beaded for a little bit of sparkle and in the lower part of the sample big red beads were introduced

6k: for this last sample the threads were withdrawn both horizontally and vertically. Because of the loose weave nature of the fabric some of the threads in the middle section went "loose" and I had to back them with a red ribbon from the back which was fixed with some machine zigzag stitching.
In the upper section braided cords were woven through the bars which had been wrapped with machine stitching.
Cross stitching was added in the "ribbon backed" section followed by two machine stitched rows and finally in the last row further weawing was done.
The whole sample was then framed with running stitches in red and black.
 I especially like the way the fabric reacts when you try out a different machine stitch. Even though I've used different reds with the more rasberry coloured fabric, it seems to work