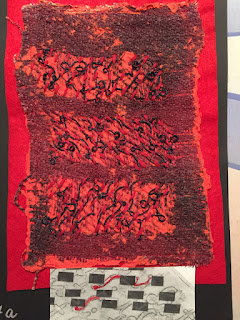
I enjoyed working on this lesson, Stitching into the samples really brought them to lifeand added dimension to them
sample 8b: here the paper/fabric sample was first covered with machine stitching, then a variegated thread was woven through it to reproduce the lettering shown in the first picture. This "medaillon" was surrounded with machine stitching
sample 8c: here free-motion zigzag stitching was used to stitch into the circles
sample 8d:the inspiration for this piece came from the lettering exercise where the letters were formed by printing with the edge of a credit card. When you turn the paper a mysterious pattern of lines appears. I try to imitate this by using fly stitch with a black thread.
sample 8e: The stitching turned this very "boring" paper/fabric sample into an interesting piece achieved by making long stitches to form the letters. This sample should be seen horizontally so that the letters are not legible. Deliberately no stitching was done on the surrounding fabric so that the eye would not be distracted from the strong graphic mark done with the stitching
sample 8f: The letter "L" was done with cross stitching, trying to achieve a "dissolving" effect
sample g: free-machine stitching was done on this piece, first "writing" horizontally then vertically the words "shopping list"
sample 8h:I couldn't resist trying to reproduce the pattern formed by cutting out the letters with my Silhouette. For this I drew the pattern onto paper and then stitched through it from the back. However the tracing was hard to be seen from the front, so for the lower part I did the same from the front and then, after having puller all the paper bits out, I used more free-motion stitching to fill out the letters
sample 8i: fly stitch was used to form the square around the open spaces. These were filled with letters, X's and then zigzag stitching
All these samples were backed with light red commercial felt


No comments:
Post a Comment