Sunday, 16 June 2019

Module 5-Chapter 11 Design from Landscape - Divisions

For my finished piece I was inspired by a sentence found in a beautiful book on the area where I took my pictures,  At some stage the author said that nature "healed itself". In fact the area and the surrounding woods were laboured quite intensively some time ago when they extracted iron ore. This has changed the landscape and also the vegetation.

So I decided to make a long strip representing a (medical) bandage on a bobbin.

The design obviously had to fit the subject. I wanted the width to be about 10 cm. It would be difficult to make something narrower. For the length I was thinking of the Fibonacci sequence, as suggested by Siân. The strip should be about 80 cm to allow for divisions into 40, 25 and 15 cm.

I made a bobbin out of polymer clay as I couldn't find one with the right measurements and made a mock-up


Then I looked at the different designs that could be translated into a strip


I finally decided to contentrate on 2 designs and tried to translate it into a long strip


Design 1a and b

Design 2a
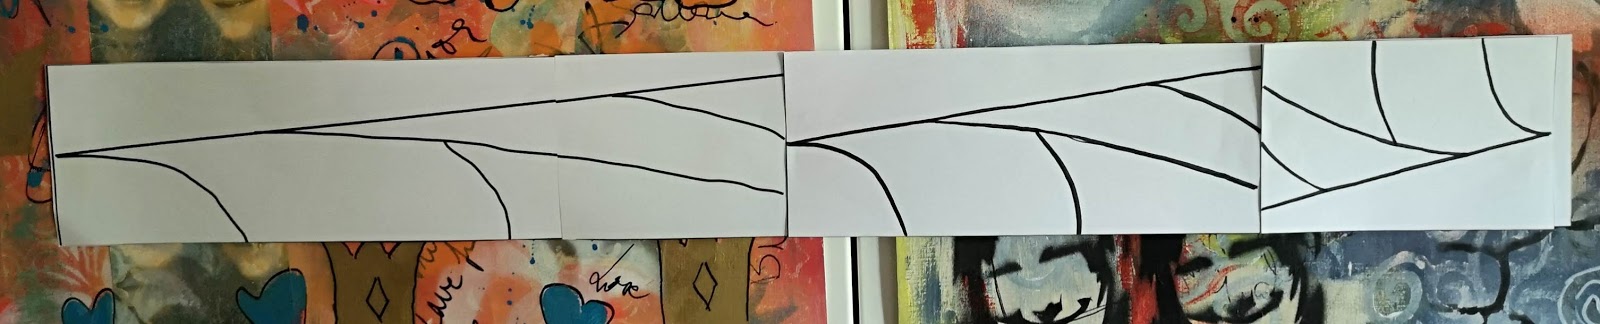
as you can see I had turned the last smaller part upside down. This gave me the idea to change the directions of the different parts
I found that this design had a much nicer "flow", the different sections are larger and it would be easier to translate them into fabric.

This is the final design I'd like to use. I connected the different pieces to make one long harmonious strip.

And finally I finished my bobbin
I wanted it to look like an old rusted spool. For this I made a base with white polymer clay as you can see in the mock-up from before. This was then covered with  brown clay lightly textured, painted with Golden iron oxyde then rusted. The spool was baked after each section of work.
I'm quite happy with the result and think that it doesn't look at all like polymer clay anymore.


Module 5-Chapter 11 Design from Landscape- Landscapes part 1

I went back into the woods to take some more pictures that could lead to a "landscape translation"
Some designs are far too complex and would have to be simplified to become appropriate to the subject and to be translated into fabric


Sunday, 26 May 2019

Module 5 - Chapter 11 - Design from Landscape


 I started to rust different fabrics ranging from synthetic ones to coton ones. As I didn't have rusty items I had to make them produce rust. As most of the metal items you find in the hardware store are treated not to rust I first had to remove this by putting the metal into hydrochloric acid, I agree it's not an eco-friendly method but a fast and efficient one.

I went back into the woods to take more  landscape pictures but also to reconnect to my subject.

The following are just simple as I'm not sure if I'm going in the right direction


Sunday, 14 April 2019

Chapter 10 - Stitch to translate

With the vast amount of rubbings I made, I chose the ones that most appealed to me.

The samples were done on black linen stretched in an embroidery hoop. I only looked at the rubbing and not at the photograph for inspiration.


Sample 10a: the stitches done here were very very long fly stitches executed with a fine thread. More stitches were added by turning the sample upside down. When I took the sample out of the hoop I noticed that the stitches were quite "loose" because they were too long. Here a light interfacing ironed on the back solved the problem. 


Sample b: The stitches were done in a thicker wooly thread using a blanket stitch with variations in size and direction. The stitch was worked in both directions to form irregular squares. Filler stitches were added with fine thread in bokhara couching to reproduce the background "noise" of the rubbing.


 Sample 10c: who would have thought that this paper sample produced this rubbing. I only found out when I added the pictures to the blog.
I saw fly stitches here.In the fabric sample these were done with a double thread of different whites in the needle. A set of 2 stitches were done joining in the stem which was then wrapped with a blanket stitch . Filler stitches were done with a doubled fine thread and these stitches were left a bit loose.


 Sample 10d: This sample was done in the Litch Stitch which I absolutely love. Here it wasn't used to build up a lot of texture but to form little "worms". They were done with a chenille type knitting yarn and then with cotton floss. The background was covered with little straight stitches.


Sample 10e: The translation into stitch from the picture is quite obvious. The strong "V" shape was done with  irregular bullion knots to form the shape. Then fly stitches in fine thread were added. These were done in from all directions so that it is hardly visible which stitch has been used.