Sunday, 21 February 2010

M2-Chapter 9 The Fibonnacci Sequence


The Golden Section:

drawing on squared paper and sample with decorated papers using tonal grading
------------------------------------------------------------------------------------------------
Sample 1
four patterned papers put into a gradual tonal "column"
first column: 2cm
second column: 3 cm
third column: 5 cm
fourth column: 8 cm

Sample 1


Sample 2
Sample 1 cut into 4 sections vertically using the same measurements than in sample 1

Sample 2
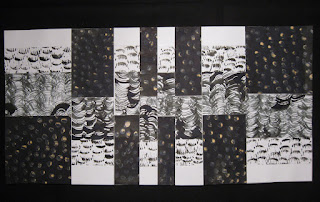


Sample 3
Strips from sample 1 cut using the Fibonnacci sequence, flipped and glued down, starting with the widest section

Sample 3


Sample 4
one patterned and one plain paper cut into strips using the Fibonnacci sequence. The strips were arranged alternatively starting with the widest strip of the patterned paper and the smallest strip of the plain white paper


Sample 4


Sample 5
Sample 4 cut at right angles . These strips were arranged onto a plain background, leaving gaps of the Fibonnacci series of proportions

Sample 5


Sample 6
The strips of sample 5 were flipped and glued down.
I made one mistake at the beginning of this sample series: for more contrast, I should have taken a black background for gluing down the stripes or I shouldn't have taken a plain white paper but a decorated one instead. Thus I would have achieved a more interesting sample


Sample 6


Sample 7
A Fibonnacci block using 5 strips in tonal order was copied and one copy was placed up-side-down next to the original.

Sample 7


Sample 8
Equal strips were cut from the above block and alternate strips were moved slightly up to form a fractured design


Sample 8


Sample 9
Strips from block 7 were placed in the same formation as strips for log cabin patchwork

Sample 9


Sample 10
Block 7 was cut up into equal 45° strips,
these were then flipped and reassembled


Sample 10


above block was cut into stripes of 3cm width that were then flipped again and reassembled


Sample 10


Sample 11
Fibonnacci sequence block

Sample 11


Above block was cut up and reassembled, flipping each other stripe


The block was then cut up using the 45° corner of "Mary Sue's Triangle ruler"
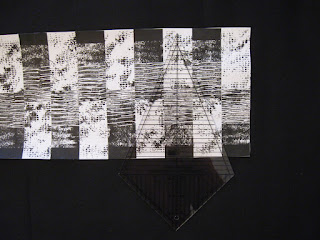


The triangles were flipped and then glued down.


Sample 12
Golden Section sample.
Log cabin squares were produced using strips with increasing width


Sample 12


Sample 13
For this sample I randomly glued leftover strips from this module onto a background paper before cutting out the shapes that produce this Golden Section spiral.


Wednesday, 10 February 2010

Hands

This is a little gift I made for my chiropractor to thank her for her help. It hasn't got anything to do with this Module, but was certainly inspired by the black and white work.
Posted by Picasa

Tuesday, 9 February 2010

M2-Chapter 8 Toggles

wo fabric rolls, one stitched before being rolled, the other one "plain"

Posted by Picasa

M2-Chapter 8 Not what it seams

Sample a,b,c
Various fabrics and threads (sample a) were inserted in the seam

Sample d
The "left" side is the "right" side (sorry, didn't know how to explain that in English),
the fabric was cut, more fraying could be achieved by washing it and putting it through the dryer
Sample e
fabric inserted in the seam

Sample f
Here I left a very large seam which was then cut to form triangles attached with stitching, twisted and knotted machine cords were inserted in the same sample.
Sample g
A large piece of calico was inserted, cut to triangles, attached and frayed

Cords

I had a lot of fun making these and think they would also be great to use to decorate the finished 3D item.
a: white and painted strip, twisted and machined with zig-zag stitch
b: fabric strip and thick silk thread were twisted and then machined with a straight stitch
c: twisted, machined and knotted fabric strip
d: fabric strip twisted and wrapped with a fine wire
e: thin fabric strip and decorative thread covered with zig-zag stitch
f: fabric strip with decorative thread attached to it
g: two fabric strips knotted together
h: fabric strip with packing thread attached to it


Toggles

- packaging cord covered with zigzag stitch
- two different fabrics strips covered a decorative stitch
- two different fabric strips twisted and covered with zig-zag stitch

Posted by Picasa

M2-Chapter 8 Ribbons

Detailed view of ribbons

Sample
a) 3 different fabric strips of different widths were layered and stitched together with a ziag-zag stitch
b) twisted fabric cord attached to a fabric strip
c) fabric strip decorated with machine stitching
d) same as c
e) thread attached to a fabric strip with decorative stitching
f) fabric strip machined with zig-zag stitch with increased upper tension to bring up the bobbin thread.
g) the same technique as for sample f)
I like the way the fabric strips puckers and distorts with this technique, giving it extra texture
sampled e to g could be rubbed with black or white painstiks

Sample
h) fabric strip covered with dense machine stitching
i) two different fabric strips machined together
j) fabric strip decorated with thread (Texere yarns)

Posted by Picasa

Sunday, 13 December 2009

M2-Chapter7 Traditional "Piecing" Methods

Transfer adhesive method

width of each fabric strip: 2,5 cm
method: I backed the strips (black and white together) on bondaweb before cutting them up and ironing them onto a base white fabric. The cut edges were then covered with a narrow zigzag stitch.

Sample 1 - 3Sample 4
Sample 5
Sample 6
Sample 7
For this sample the strips were cut at an 45° angle

Stitched seam method

Stitch width was 3,5 cm including the seam allowance of 1,5 cm

For this method one should try to iron the seam allowances towards the dark fabric, if possible.

Sample 1 - 3
Sample 5
Sample 6
Sample 7

Sample 4, 8 and 9

Sample 8: The black and white strips were cut with a triangle ruler with the 45° tip.

Sample 9: the fabric was cut into stripes of different widths, sewn together as shown on the diagram

General remarks:
The samples produced with the transfer adhesive method are, and also, look "flatter".
Some of the backs of the stitched seam method samples look very interesting.
I tried to use up some of my cold wax printed fabrics where the pattern was too "obvious". Cutting up these fabrics broke up the pattern.

CAUTION
When using the rotary cutter, care has to be taken to cut "away from the body"
It's also important to keep it away from children.

M2-Chapter 7 Traditional "Piecing" Methods

I put the paper sample and the fabric sample next to each other.
In all the samples the tone is going either from light to dark or from dark to light

Sample 1: All the stripes have the same width and are getting darker

Sample 2: I changed fabric for each piecing

Sample 3: different stripe width on the left and right side, different fabric value

Sample 4: courthouse steps log cabin

Sample 5: same as sample 4 but with one more "round"


Sample 6: courthouse steps log cabin with decreasing width of fabric strips

Sample 7: square put in the right corner

Sample 9: instead of a square, a triangle was used, which, of course changed the shape accordingly
Paper sample 10: square put diagonally
Sample 11: here the square is rectangular

Sample 12: here the center piece is irregularn so that it produces a shape which reminds me of the tortoise pattern